While I'm pretty chuffed to know that people are actually reading, I'm also still excited about how easily the skirts came together so I'm happy to share. If you don't care, I'm not at all offended if you stop reading now. For the rest of you, here we go!

Firstly, you'll need to measure your kid. I measured around Rachel's waist at about 60cm, and then I added an extra 2cm for a bit of give. These skirts are going to have elastic in them to keep them on, but they have to stretch to get up to the waist, so you need a little extra. Up to you as to how much you add, obviously more will let them last longer, but you'll have more bunching at the start.
I also measured the length I wanted the skirts to be from her waist (where the skirt would sit) to where I wanted it to end up (knee length in this case). Then I added a couple of centimetres again for hems and what not. These don't have to be super precise, unless you are really aiming for an exact length. I have a problem with odd numbers too, so if she measured at say, 31cm, I would have added two and then rounded up to 34cm just because 33cm isn't as nice a number (for me). What can I say, I'm a little bit weird.

Using the waist measurement, I went to the Circle Skirt Calculator and it told me the radius measurement that I needed to cut out the fabric. One thing you'll need to keep in mind, is that the Circle Skirt Calculator uses pre-set lengths, which are obviously for adults. Don't stress about it. Just choose the shortest length for the calculator, but then use your own length measurement (from your child) for your skirt.
I don't have a photo of cutting it out, but Sophie's skirt wasn't going to fit, so I just added an extra bit of fabric (you'll see it in the finished photos at the end) to make it up. Not the end of the world, but something to keep in mind if you have a child over about seven years of age.
After you have your first piece, lay it on the second fabric and cut that out as well - this way, your pieces are going to be identical and the skirt is going to be reversible!

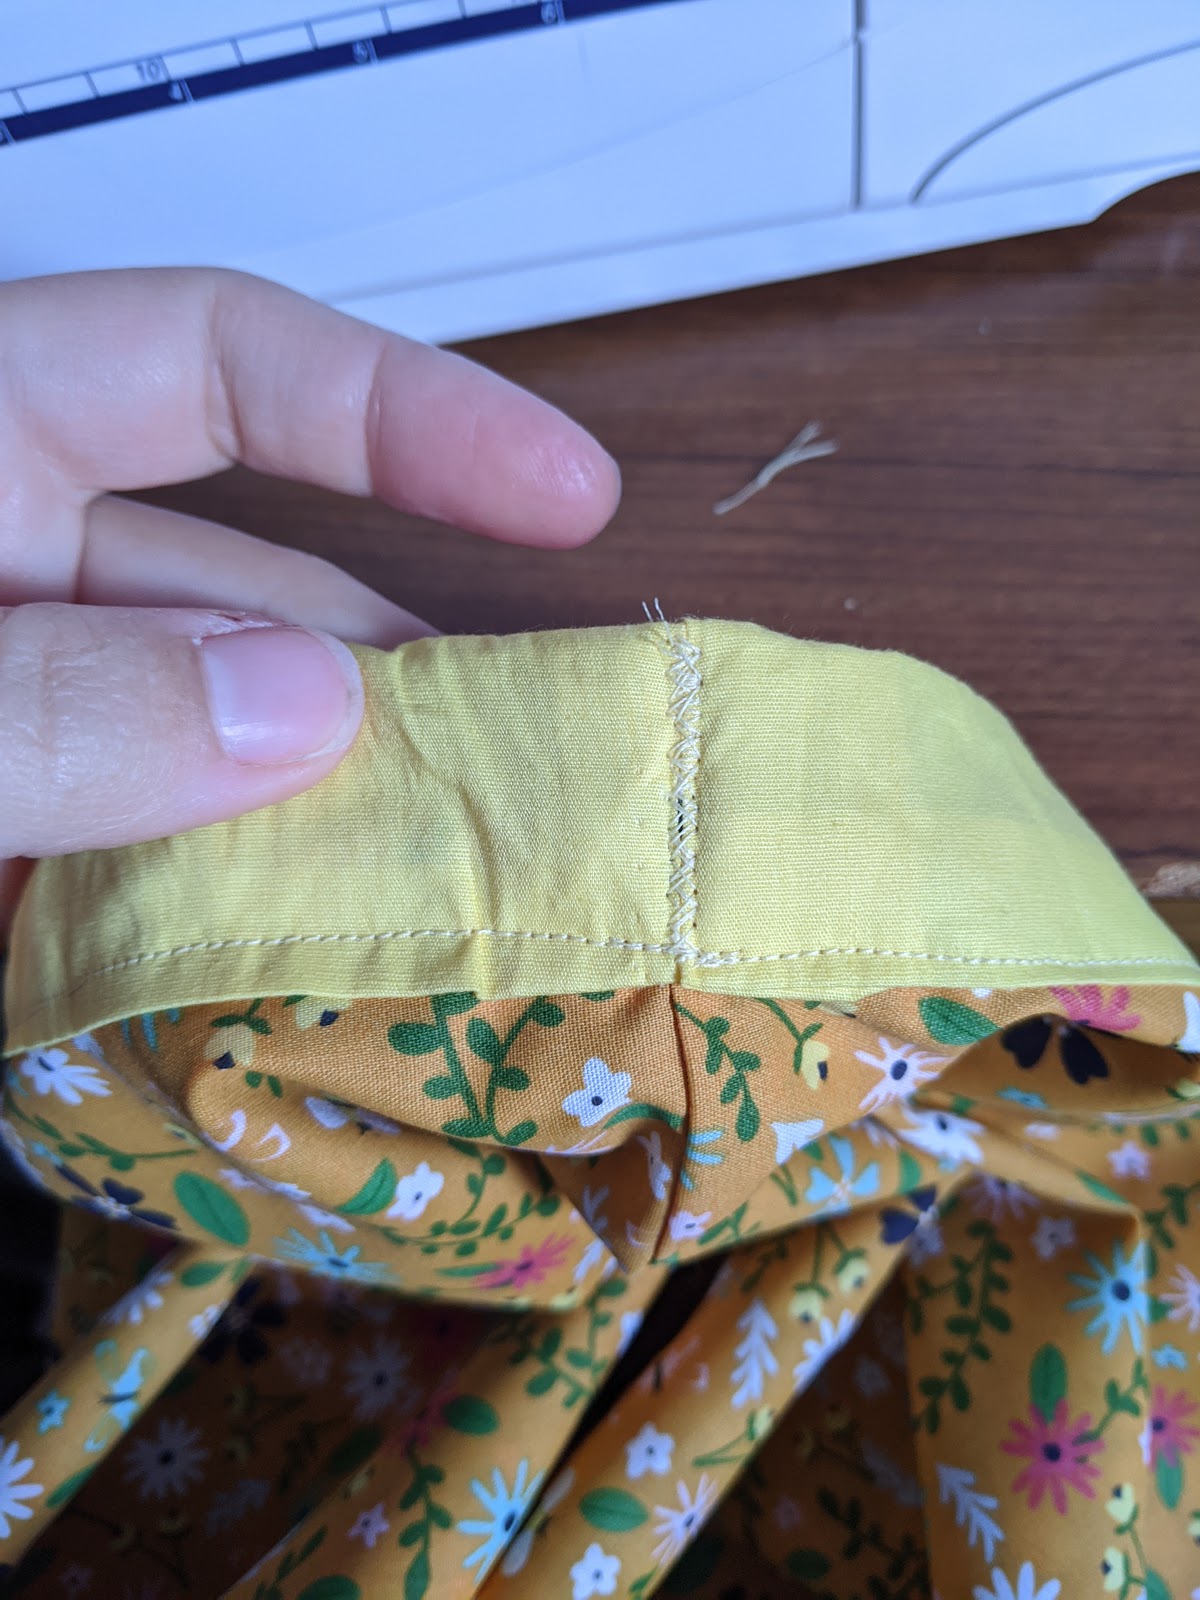
With both skirt pieces separate, just flip them right sides together and sew up the one side that's open. You cut on a folded edge, so you should only have one side to sew. You don't need to worry about "finishing" the seams, since they will be inside the skirt when you finish.

The next thing to do is to flip one of the skirts and put it inside the other. Both skirts should have right sides facing each other, and from the outside you should be looking at the wrong side of fabric. I hope that makes sense.

Sorry for this bad night time photo! When you have the two pieces together, you sew the bottom hems together the whole way around. After that, you flip them back to right sides and you are nearly done!

Next step is the waistband. For this, you could do some tricky math to figure out what the circumference of your waist circle is, or, you could just cut a rectangle that is too long and trim it later. This is absolutely what I recommend. What you can't avoid is ironing. This helps so much, so don't skip it.

You'll want your rectangle to be longer than the waist of your skirt and however wide you need it to be. I know that's really vague, but everyone is different. Let me explain: mine is 4 inches (sorry, inches are bad I know, but my cutting board and ruler are in inches so that's what I'm working in). It's 4 inches because I know I'm going to loose about a half inch on either side in the seam, and then my elastic is one inch, and it needs two sides, and I want to give myself a bit of wiggle room, just in case. Make sense?
If you like working with smaller or larger seams, adjust accordingly. If your elastic is wider or thinner, adjust accordingly. If you don't like odd numbers (no judgement here), adjust accordingly. Anyway, you hopefully get the idea. Once your rectangle is cut, you should iron it in half and then the edges up as much as you expect the seam to be. That gives you a really easy line to follow to sew along and helps everything fall into place later too.

Double check that your waistband is long enough. Remember your skirt has a front and a back, so it's got to go across that curvy top edge twice. When you sew it though, you'll be pulling that curvy edge straight to match. See below:

Ready to sew that waistband on! I lined it up with the side seam of the skirt piece. You need to fold back the end of your waistband and then sew around the skirt along your top fold line - see the picture below for a visual.

When you get all the way around, you'll find yourself back at the start but with extra waistband. Now is the time to cut that extra off. Just make sure you leave a centimetre or two so there is enough to match up and to fold back to finish.

Hopefully it's visible in the picture below, but the excess is cut off, the end edge is folded towards the presser foot and I'm about to stitch over it to finish that bit of the waistband.

Then you take it off the machine and your waistband should flip up along the edge that you sewed/pre-ironed. Hooray!

Make sure the ends of the waistband are folded in, fold the seam down and then pin it to the skirt on the other side.

Then you simply stitch all the way around again and this time when you get back to where you started, you'll notice this handy hole in the waistband. Usually, that would be really silly and annoying, but in our case, it's actually perfect for inserting the elastic!

Put your elastic in, sew the ends together and then watch it disappear into your waistband like absolute magic.

Last thing to do is sew up that little gap. You can use fancy invisible ladder stitching if you like, or you can just zig-zag it closed like me. It's exciting to know that the join of the elastic is right there under that zig-zag and if I ever want to let it out or replace it, I just need to unpick that little tiny bit and the join is there waiting for me.
Hooray! You've now got a completely reversible circle skirt, ready to take out and play.

Or, if you are like me, you've got more than one. Rachel's skirt was made with some fabric mum had given me as leftovers from a dress she made the girls, and a new bit that we picked up on sale at Spotlight earlier in the year.

This is almost the very last of the unicorns, stars and that bluey floral that came from Aunty Sue in Sydney. This dinosaur print below is probably my favorite. It has also been shorts for Sophie before (as have the unicorns above actually) but it was fun to use it in such an uninterrupted way. Do you see what I mean about just adding a bit of extra material? The other side of Sophie's skirt is some strawberries that needed extra too, but I just did the same fabric rather than a contrast.

I dressed up that pink one (it's the reverse of the unicorns) with some of the blue flower trim that I used for this dress up dress last year. It's actually a gift for the same little girl, so I hope she still likes blue and pink. There is nothing quite so satisfying as a stack of freshly made clothes ready to be worn.

Half circle skirts for the win. I hope this was informative and helpful if you ever want to make your own skirt. Happy sewing!
No comments:
Post a Comment