Showing posts with label Scraps. Show all posts

Tuesday, August 12, 2025

Small Sewing and the Soran Bushi Outfits

I am honestly missing my sewing machine more and more as the weeks go on. Maybe as the weeks tick by and we are closer to coming home it feels so close and making me long for it more. Or possibly more for the creative sewing outlet, and also for the speed at which you can make a thing. Even so, I'm continually surprised by how quickly I can hand sew something when needs must, so here are some small things I've done in the last couple of months. 

Our home in Yotsugi had only shoji screens, and no curtains, so the morning sun in our room was quite bright. Steve picked up an eye mask from the 100yen store, but it turned out to be polyester which is essentially plastic. Not fun to have on your face in the summer. 

I took it apart to salvage the elastic and made a reversible one out of some leftover fabric from the girls' school bags. It was quick and effective. I wonder if it counts as zero waste if I use every part of the fabric I bought, even if it ends up being on different projects? Maybe, or maybe it's just "sewing my stash". 

I also patched a pocket of Steve's pants with the cat fabric. You can see in the picture it's already been patched back in Australia using some leftover fabric from my dad's Christmas shirt. I'm glad to be extending the life of the shorts, though I don't know how much longer they will take. 

For Steve's trip up Fuji-san, he needed to carry everything in the backpack and the big jacket was not fitting. So I suggested adding some elastic strapping to the front of the bag to stuff it in/hang it off. 

I made small loops with some leftovers from the Red Yukata, and then threaded some elastic through. The end result was exactly what Steve needed it to be. 


The  last bit of sewing I did in Yotsugi was to prepare some happi type garments for the girls. Happi are a Japanese jacket that are worn for festivals. They are often costumes for things like dances. Sometimes they have sleeves similar to a kimono or yukata, sometimes they are shorter, more modern looking, and other times they don't have sleeves at all.  They are always made with the same rectangular body shape with a standard long Japanese collar attached. 


These are Zero Waste because the fabric cut for the collar part is just folded into the collar to reinforce it, and everything is rectangles. Any extra length is generally tucked in for extra strength. 


It started like this (below). The slit up the middle is also cut about 8cm into the shoulders on each side, and then the collar is sewn around, just like a yukata. Then it's just side seams and hems. So easy. 


I also made the girls each a hachimaki (headband) out of the blue fabric to match. The reason they needed these was to submitt their entry into the school talent show (in Australia). They decided to dance the soran bushi which Rachel learnt for Japanese school sports day. They worked really hard perfecting the dance and I made the costumes. 


We actually filmed their audition video when we had left Tokyo and were staying at the seaside in Shodoshima. It was perfect to do this traditional fisherman dance by the ocean and we are really proud of the girls. Hopefully they get to the finals! 

Sunday, March 16, 2025

Sashiko Prep

After falling in love with sashiko and making a couple of little cloths that ended up as whiteboard cleaners in my classroom last year, I wondered how I could continue to include sashiko in my sewing life. I wanted to try lots of different patterns but I also wanted them to be part of something practical. Luckily, inspiration hit. 

I had unintentionally made whiteboard cleaners with my last round, so why not make more? My classes often use mini whiteboards at their desks or on the floor, but I have no class set of erasers or cloths for them. At the moment, I just have the kids flip their boards and give them a quick rub on the carpet to clean them off. Unconventional, I'll admit, but it does the job. 

Anyway, back to sashiko. If I had a class set of say, 25 or so small cloths, these could easily be used for whiteboard cleaning. And I could use them to spark the students interest in Japan with Japanese patterns! It's a lesson in and of itself. Or run a lunchtime club with the older students to teach them sashiko too! Everything is learning. 

So I went through my scrap fabrics looking for anything plain and robust in reds and blues. I ended up throwing in a piece of purple too, since the scrap that I had (probably from Aunty Sue) cut into six double sided little squares quite easily. Some of the scraps I recognise and know exactly where they are from (Blue lining fabric from my Mary Poppins Skirt, and two blue squares from the actual skirt material, one blue square from a pillowcase (just like the last sashiko), some from Sophie's Lana costume, red denim from my mum that's been in various things is the only red I recognise though!)

I took a bunch of the red ones first and drew up the grids and patterns I wanted to try. I was sewing these at church, but also in our staff meetings and the three days of professional development we did at the start of the year. I don't know if it was that the pens are old and I was pushing hard, that the ink stayed on a long time before I ironed it off, or some other reason, but the fabric pen ink didn't disappear as magically as it usually does. I am not offended by it, since they are just going to be used as whiteboard cleaners by a bunch of primary school students, but it does make me cautious about using them on future projects.

Part of me thinks I'm getting better at sashiko, while another part of me disagrees quite strongly. I like the sake bottle design one more than I thought I would. Designs with two colours also appeal to me, and the circle one is also a fav. I am beginning to realise thread colour choice is very important. 

That red one with the orange thread is very poor indeed (pictured at the start of the post). Which is why I stopped doing it. I think I need to unpick all that work and try again, with much more focus on my stitch length and how many I have on each line. 


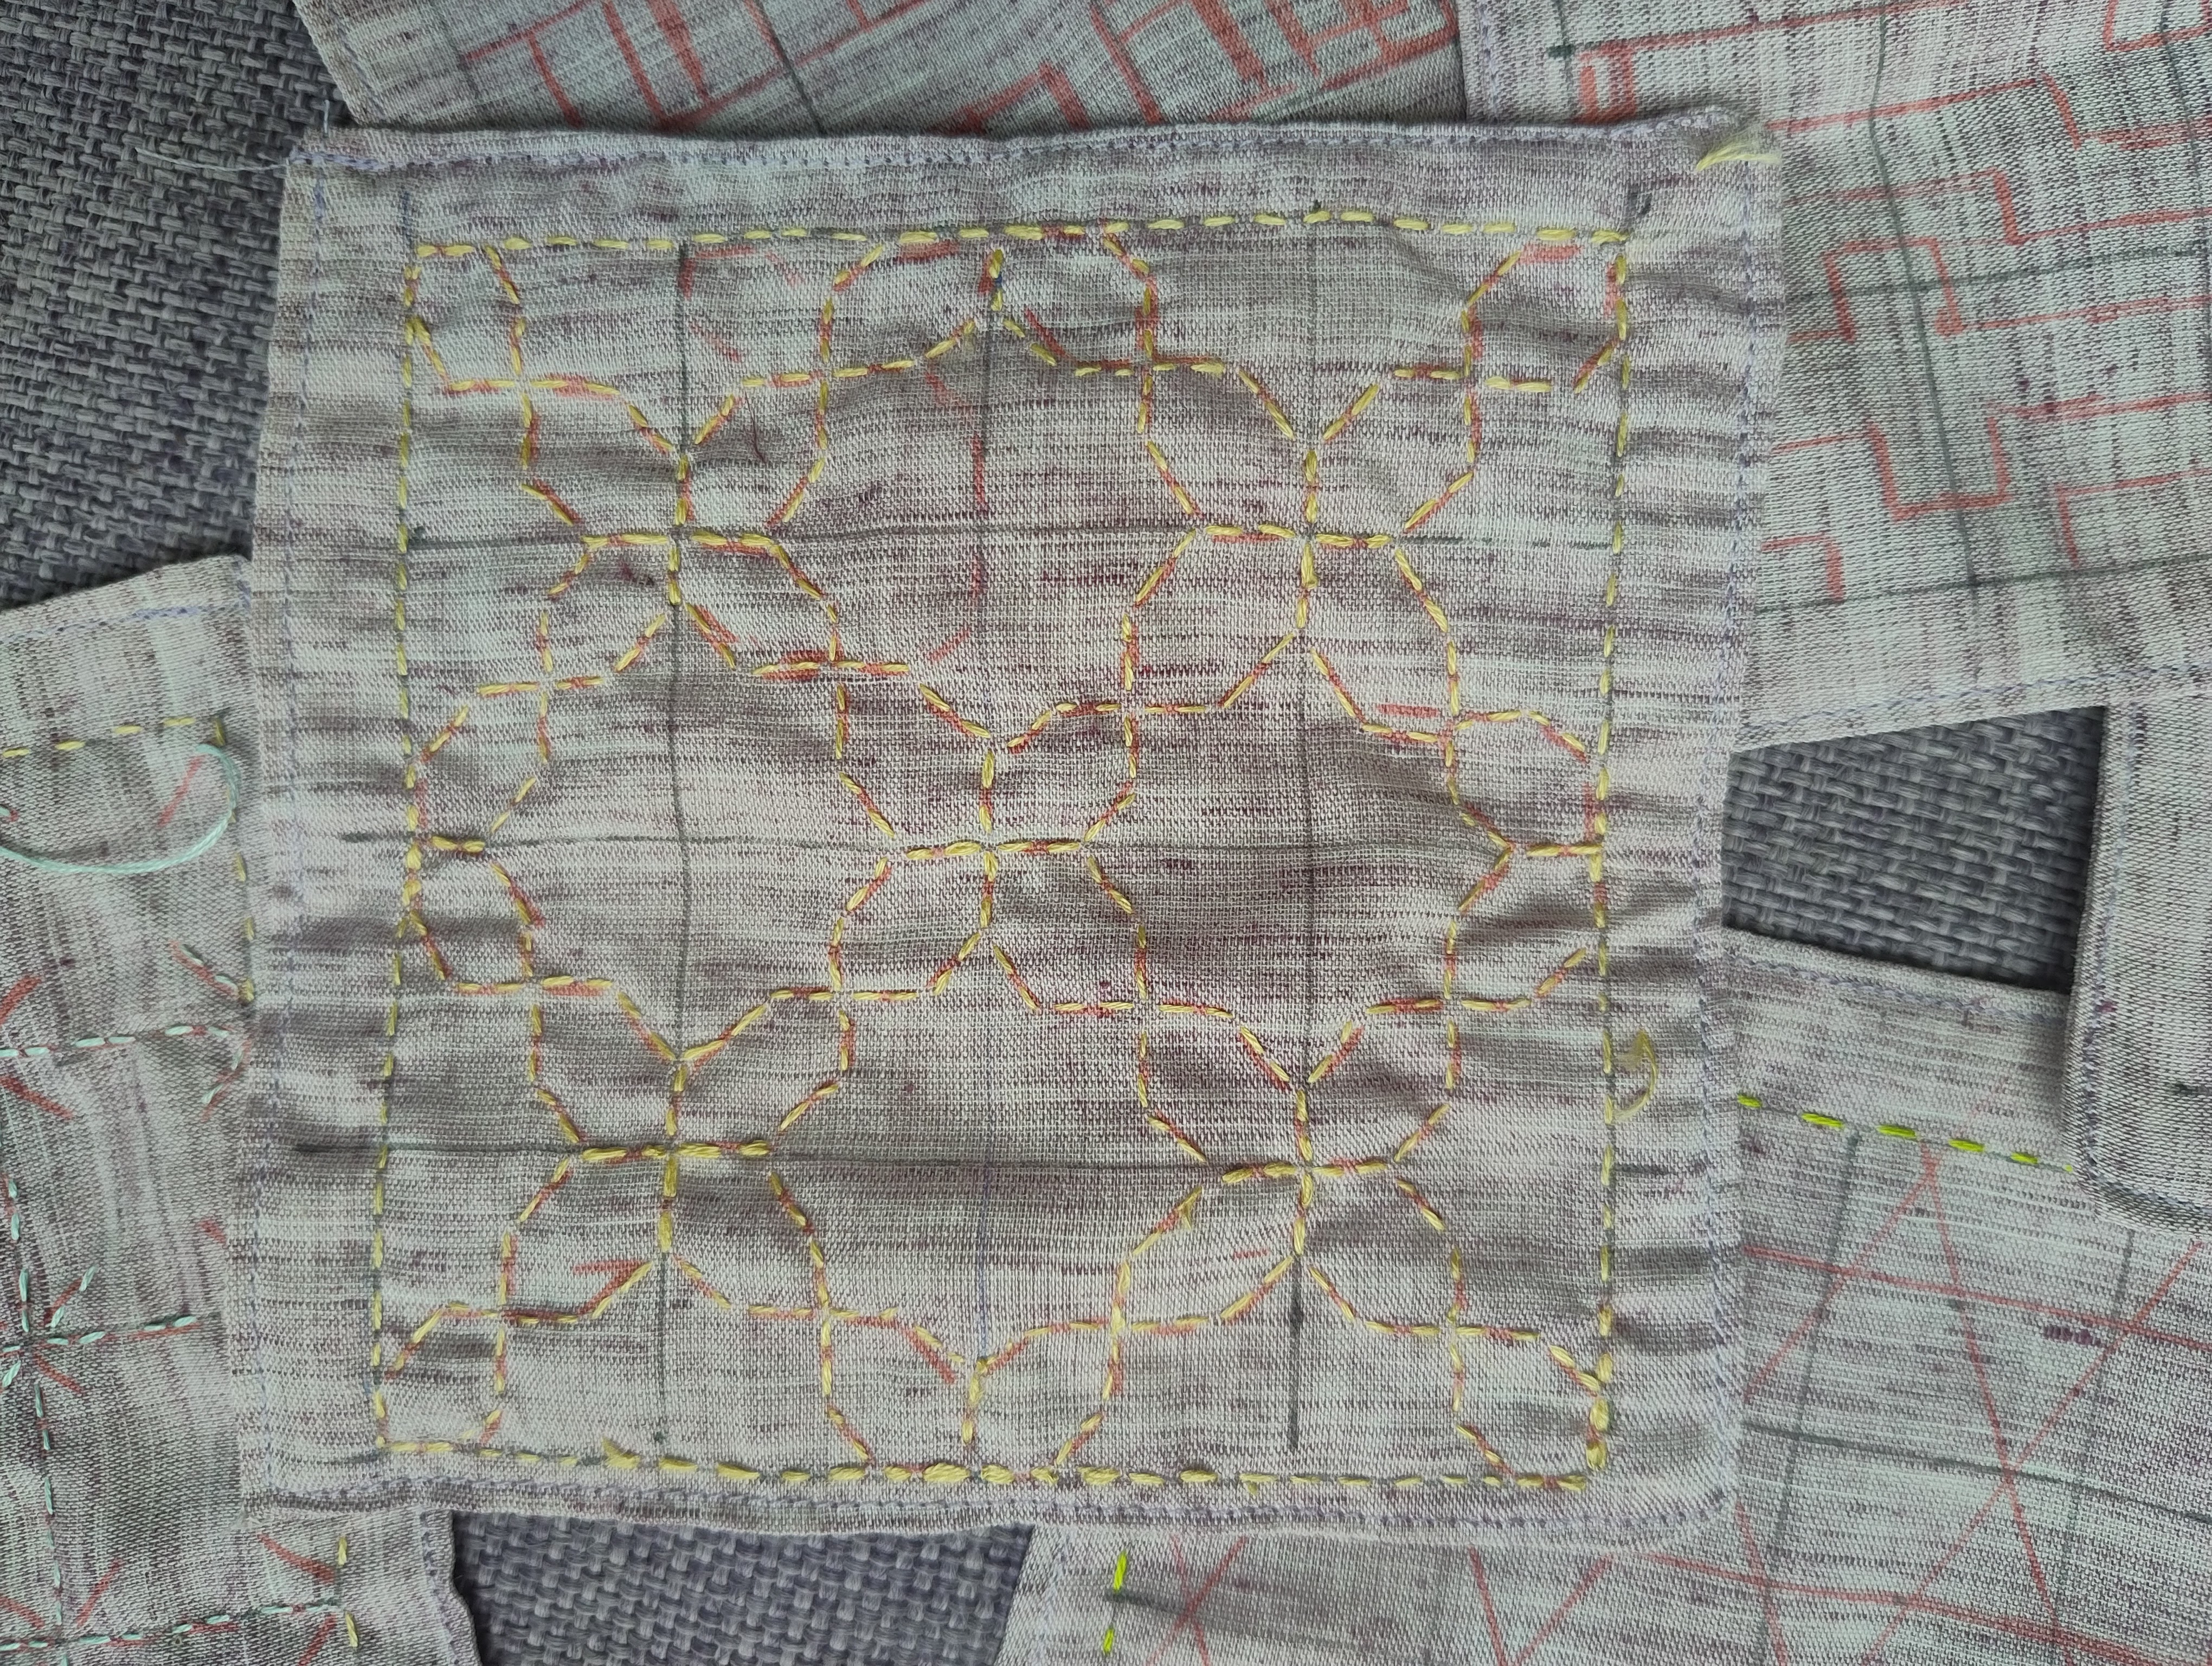
In the mean time, I took a foray into the purple fabrics (which look rather grey in these photos, but are actually a nice mauve in real life), but I don't know if it's the thread colour I chose, fabric or the designs, but I don't love them either. One of the purple ones has some of the best intentionally small stitches ever, but something seems off. 

My guess is the thread colour. The designs just don't pop because there isn't enough contrast. Will have to choose something darker for the next one. 

In the mean time, I'm eight designs in, with two WIP, and four marked up waiting to have thread added. 21 squares of prepped fabric in various shades of blue and red still hold in stasis until I can get the book from the library with the patterns again. I don't know if it will come before we leave for Japan. In that case I'll either have to find a Japanese book in Japan, or try my luck with the internet. Both of these options are pretty workable. 

This project is so perfect for travel too, since they are small and portable. Looking forward to having a class set of these for my classes. Hopefully the students appreciate it, though I doubt it. Not because they are malicious (well, most of them aren't), but the rest just won't because they are kids. 

Friday, February 28, 2025

Spontaneous Sewing Makes

Post Christmas, I did a couple of spontaneous sewing makes. I honestly thought I wouldn't want to touch a machine in ages since I had actually had a hugely productive sewing December (two Christmas Shirts (Dad & Luke), Mum's Shirt, shorts and dresses for babies and toddlers (all found here), as well as all the tedama that I churned out). But for some reason, it was totally fine for me to do these littlish things. 


Steve's gi bag for Jiu-jitsu was wearing thin and he needed a new one. I used the draw string from the old one and sewed up a similar design replacement in this fabulous black, gold and orange koi fabric that I'd picked up in Japan. Steve's choice! 
ˆ

It was a very straight forward sew - I added a lanyard clip for keys and sewed on a slip pocket on the inside for his phone (actually after the fact, but it was easy enough to add). it looks great, is sturdy (French seams for beauty and strength) and Steve has been using it every week.


No points for guessing the next make is for Rachel, since it's using the cow print fabric leftover from her onesie. Rachel got a new set of pens for Christmas but didn't have a pencil case big enough to put them in. We did a brain storm on design (flat or boxy, two pockets or one) and what fabric combo she wanted. We went through the box of zips - many of which I've unpicked from bags that are otherwise falling apart. 

She might have wanted to make it herself, but I was a little bit in the zone so I just sewed it all up for her. The inside is lined with a hand me down scrap from the stash (again, probably from Aunty Sue.) It's a white with small rainbow hearts, but it's quite see through, so I can't see us using it for much  other than linings.


The cool insect fabric is some that I got on sale at Spotlight a year ago. I have vauge plans for a dress (I keep going back and forth between being ok with making something for Rachel and wanting it for myself :P) but with two metres of it there was enough to sacrifice a strip for the contrast. Rachel requested the zip pulls be cow fabric and I added the lanyard clip just in case. 


Pretty straight forward, standard pencil case, making everyone happy. I also sewed up two of the standard kind of "green bag" that we use for groceries in Australia. 


Mum had given me some fabric for Christmas that I didn't think was destined for a garment of any kind. As I looked at it though, I knew it could still be useful. Our current collection of green bags are good, but I had found that when I wanted to take a cake somewhere, they were all about 2cm too short across to fit the container comfortably. New bags were in order. 


The hardest thing about these was figuring out the maths to make sure I cut them in the most effective use of the fabric. As it was, I ended up using every little piece of the 1.5m that Mum had gifted me. Zero Waste Achievement Unlocked! 


The bags are standard boxy numbers. I reinforced the base with some hard-core interfacing I had left from making obi a couple of years ago. Sides are sewn with French seams for strength. They even have little tabs on the side for looping over the bag rack at the shops. 


 I'm pleased to report that they work very well for their intended purpose.  

Monday, February 10, 2025

Last Min Small Makes for 2024

As school was wrapping up at the end of last year, it came to my attention that Rachel's teacher was pregnant. Sophie actually had this teacher two years ago, and I'd already sewn for her a little something for her first bub then. It was a (un-blogged) Rachel Bunny, which Sophie requested we sew. 

Since I've an affinity for sewing things for pregnant people, I thought I would get to it, though I figured I'd make something slightly more practical this time. So I dug through the stash, found just enough leftover monster material and these great humming birds from Steve's first shirt to make a couple of pairs of shorts. 


Another of Rachel's teachers (from two years ago) was also pregnant at the end of last year and Rachel still talked about her as the best teacher in the world, so I offered to make her something as well. Ironically, her name was/is Miss Bunney, so Rachel was hoping for another furry friend, but with the tight turn around in time (first week of Dec) with all the other things going on then, I just didn't have it in me. So I just made two more pairs of shorts, nearly using up all the fabric perfectly. We gave the teachers the shorts with some fabric markers so they can enjoy colouring in the monsters together.

While I was digging through the stash looking for shorts fabric, I had yet another baby in mind - one of our friends from church was expecting a little girl in early January. I happened across this scrap of fabric (I think from a donated box from Aunty Sue) that was exactly the right amount to make this little tie dress.  


Just like I made Sophie for her first Christmas. Back when she was small. The skirt felt a little long, so I added a pin tuck and it's rather sweet now. 

And then, while I was doing that, and also wrapping Christmas presents, I realised I wanted to add a little something special to my nephew Archie's present, so I used the very last of the humming birds with a couple of blue scraps down the sides for stripes to make the fabric actually fit the patter, I whipped out one last pair of Sycamore Shorts for the year. 

That takes my total of Sycamore Shorts for 2024 to 11. Not bad. 

Friday, November 15, 2024

Tedama: Japanese Juggling Balls

I realised after my post on Street Camp, that I have never blogged about what has now become one of my favourite hand sewing projects. Tedama, are Japanese juggling balls. The word literally means hand (te) ball (dama). I learnt how to make these way back when I first lived in Japan 20 years ago. I had joined Japanese Culture Club (after the every day two hour training nature of the Volleyball club left me with zero joy) and sewn my first yukata there (I mention it here if you are interested). After I finished the yukata, the teacher filled in some time by teaching us how to make tedama before the school year was up. 

All you need is four rectangles of fabric that are a 1:2 ratio. So if you did 1.5 inches, the other side would be 3 inches. (Sorry Aussies, quilting has ruined me and I now often measure in imperial when sewing; horror!) I made a bunch way back then, and I think some more when I started teaching Japanese in 2009, but it had been several years since I'd given it a go. I will admit to googling the instructions to refresh my memory!


Tedama usually look beautiful because they are traditionally made out of the scraps from old kimono. I had some of that exact kind of fabric that had been given to me by a friend a while ago, but I also picked up some when we were in Japan earlier in the year. I initially started making these to increase the amount I had on hand at school this year, but it's becoming quite addictive and I may not stop. I just do a cutting session so I have all the little rectangles ready to go. They fit easily in my housewife and are so quick to make while listening to the sermon at church or the minutes and reports at the P&C meeting. 

Anyway, I do have a goal for this year because I want to use them as an activity in my school Japanese festival in March, which means I need to have at least a class set ready to go for then. At a base level, that's 25 - one for each student. But if I want to let them have two to practice with, I'm going to need 50. And really, three each would be ideal... 

Thursday, May 09, 2024

Headbands

It feels like I made these headbands a life time ago now, since it was January and we are suddenly in May, but here we are and I thought I'd document them anyway. 

I was honestly trying to make headbands for the girls to wear at school (the blue checked fabric) from an old school dress they were no longer wearing, but thought I'd mess around with other scrap fabrics I had on hand as well to tweak the sizing and style. 

Rachel liked the style with the bow on the front, while Sophie preferred it to be flat. I used a couple of free headband tutorials from the internet, but ended up redrawing and lengthening them, so they kind of feel like mine now. 

And even though I did make all of these (and more actually!) the girls have subsequently lost a number of them and neither of them have bothered to wear them to school this term either. 

I try, you know, I try.

Friday, November 04, 2022

Housewife

I have recently been doing a lot more hand sewing. All the kimono that I've made this year, have been actually entirely hand sewn (see here, here, here and here). Which is kind of fine when I'm sitting a home sewing in front of the TV and I can just leave my little stash of fabric and supplies in a corner, but for that last kimono, I did a stack of travel sewing, from our winter holiday, to church each week. 

When I did this, I just threw everything into a brown gift bag, which worked, but was pretty average. Towards the end of it's life, it was also falling apart. I was toying with the idea of finding a better solution, or making something to pop all the supplies in, when I stumbled across this video from Sewstine on YouTube, about the 18th century sewing kits known as a "Housewife". 

Lots of information there, but suffice to say, these little sewing kits were well used by males and females throughout history. I loved the idea of having all my gear in something that could just roll up and out with everything easily accessible, so of course, I made one. 

I used the measurements roughly from the one that Sewstine does, though I didn't bother to embroider all the panels. I did consider some embellishments, but in the end, I just wanted to have something I could use and didn't want to take extra time. 

Maybe I'll make another one that's fancier, but this one is pretty great. I used up material from my stash for it. Rachel actually commented to me the other day "Mum, how come when you want to make something, you have everything already?" which I thought was pretty funny. You might recognise the outer fabric from this skirt, these skorts and this dress. The inner lining (and binding on the edge and the tie) was just from my stash, probably from my mum or even my Yia-yia. 

The watermelon pockets are actually some fabric I salvaged from taking apart a pencil case. A pen had leaked on the outer fabric, but the zips were still good, and the inner fabric was this beautiful watermelon print. There wasn't much, but I'm glad I saved it, because it was perfect for this. The scissors pouch was lined with a scrap of wool from my cape, and the outer fabric is a final remnant from my mum, which I used for the purple skirt in this post

On the inside, there is a big pocket at the bottom for threads, the scissors pouch, with a ribbon to keep them from slipping out and a scrap of felt (from Vulpix) for needles. Going up there is another little pocket and a pin cushion next to it. Then there is a little loop of elastic for my unpicker. Made it slightly fancier with a little silk flower. 

When I was sorting out the layout, I thought the small pocket near the pin cushion was a bit silly, but I didn't want a bigger pin cushion and I also didn't want a gap, so I put it in anyway. I'm actually really glad I did, because it's great for storing any little scraps or bits of thread that I cut off when I'm sewing until I can get home and pop them in the bin. 

I hand stitched most of the inside bits on, and even secured the ribbon with a bit of fancy embroidery. I think it kind of looks like the rose/flower that I was going for. I did stitch the first round of the binding on with Sally, but then I did finish it by hand. 


There's the other side, just so you know how it looks. The tie is only stitched on near one end, and it all folds up so nicely. Pretty chuffed with this little housewife. 


Tuesday, September 06, 2022

Book Week: Wylah

Since I was making a costume for myself this year for Book Week, it was only fair that the girls get costumes too. When we went on our road trip in the June/July holidays, I had seen a book in the shops called Wylah, which was about a young Aboriginal girl. I missed it the first time I saw it, but was lucky enough to grab a heavily discounted copy from a bookstore in the Blue Mountains that was closing down. 

Rachel loved it. Wylah (pronounced "Wee-lah") was in charge of teaching art to the younger members of her tribe when dragons attack. She goes on an adventure to save the day with the help of lots of Dreamtime megafauna animals. 

Wylah the Koorie Warrior
Wylah image from waylay.com.au

Wylah wears a patchwork dress made of animals skins and other natural items. Obviously I wasn't going to be able to recreate that, but I thought I could get the shape/style of it. I went to the fabric box and found some felt fabric for the top bit (Rachel wanted it to be furry/fuzzy), and then any scraps of brown that I had for the rest of it. 


It was lucky that a few of the brown pieces I had happened to have leaf designs, or flower patterns on them. Really helped with the nature feel of the dress. Knowing that Rachel would have to wear this at school and that the costume would still need to be sun-safe, I sewed it all onto a brownish shirt that she already had. 


Rachel's costume was the easiest one that I did this year, even if the circular shape of the dress was tricky to get at first. Although, even though I looked at the reference pictures for the dress, I managed to miss Wylah's feather belt until Rachel mentioned it the night before. I did plait a bit of ribbon in the morning for her to wear, but we didn't have the time to glue the feathers in. Oh well. 


Next up: Sophie's costume! It's got a lot of layers so get ready! 


Lastly, I don't want to have to put this out there, but I feel like I should; I know Wylah is an Aboriginal character, and we are by no means related. We mean no disrespect to the Aboriginal people, but wanted to celebrate a character that Rachel has loved reading about, and a culture that we love learning about. I genuinely hope that no one is upset or offended by Rachel's choice of Book Week character this year.

Monday, August 22, 2022

Guide Camp Sewing

Our girls started Guides this year and have loved every minute of it. I'm glad, because I have great memories of being a Guide when I was a kid too, and I know they are learning so much being there with other people. It also has the perks of being two hours on a Friday night. I'll be honest, Steve and I haven't really taken full advantage of that yet, but every now and then, we do enjoy the quiet dinner together. 


So one thing Guides do, if you don't know, is go on camps. Pretty frequently actually. The girls had one in August that was just at a local guide hut for two nights. I was so excited for them, because again, I can remember so much fun on guide camps. Hooray! 

What I didn't remember was all the packing. Our Guide group is lovely, but they aren't the most organised, I'll have to admit. So we got the packing list a week before the girls were to go away. All well and good if you have been on a camp before, and it's not like the list contained too many out of the box things. Wet pack, spare clothes, sleeping bag were all there. But extra things like a plate bag, to put all their cutlery/crockery in, and a tarp, that had to be two by three metres. And a "Sit-upon" which is a square mat (preferably water proof) they can use if they need to sit on the grass for a long period of time. 

Reading the list, I felt a bit silly for not remembering some of those things, but also frustrated. We did have a tarp, for example, but it wasn't quite big enough, and I didn't have two of them. Most people would have a spare drawstring bag lying around for a plate bag, but two that are roughly the same to avoid arguments? Sigh. Even one extra weeks notice would have been greatly appreciated. 

In any case, I got my thinking hat on and then got sewing. Plate bags first, since drawstring bags are easy and I was sure to have some fabric I could use up in the scraps box. Serendipitously, I found that I had exactly the right amount of material for two plate bags from two rectangles of  fabric that the girls themselves had tie-dyed after Christmas. The tie dye powders were a Christmas present from my Godmother, and I had just given them any white fabric that I had on hand to be creative with. 


Perfect for their plate bags: hooray! Rachel sewed hers on her little sewing machine while I did most of Sophie's on Sally. She had to patch her piece of tie dyed fabric first since she'd cut a random circle from one corner for something else. (See my peacock fabric below?) Sophie did come over and do a bit, but was mostly not interested. I happened to have exactly the right amount of cord and two wooden beads in my stash as well. So perfect. 


While I was looking through the stash box for plate bag fabric, I stumbled across the strip of leftover vinyl that we had from recovering the chairs. I had to patch it together to get the squares, but they are pretty sturdy. 


For the flip side, I used a quilted Lorraine Lea pillow case that my friend Katie gave me. (I've used pillowcases before see?) I figured that the quilted bit would make the mats slightly more padded and thus comfortable on the ground. Rachel learnt how to bind things when we finished all the edges with strips of the other side of the pillow case.  


Done and done. Though it was rushed, I did feel good sending them off with home made things in their bags. Also happy to report that the girls both had a fantastic time camping and can't wait to go again.